

Install Guide
| License Download Prerequisites Install guide | ||||||||
|
|
Install Guide |
|||||||||||||||||||||||||
|
||||||||||||||||||||||||||
Installation Guide
WET is an add-on to the Watir Framework to provide some enhanced features and functions. WET works in associaton of Watir. The marquee of the enhanced features is the availability of support for the XML Object depot. The XML Object depot, is a way of representing objects on a DOM page in a XML based hierarchy. On the whole, WET offers many other features like:
Support for XML Object depot to allow maintainability of scripts.
Object identification using multiple parameters.
Good control of test execution using test definitions
Results are displayed in a easily readable HTML format
Checkpoints
Reliable handling of Popup dialogs
Rudimentary datatable support using either Excel spreadhseet or XML
License information
WET has two components:
1.WET Core-It is the core layer written in Ruby. It is responsible for doing most of the automation. It is licensed using BSD.
2.WET UI-It is the .Net application that assists the tester in creating WET scripts. It is licensed using LGPL.
1.Prerequisites
1.1Hardware and OS Requirements
1.1.1Memory: 256 MB (Minimum);512 MB and above(Recommended)
1.1.2Disk Space Requirements: 500 MB
1.1.3Supported Operating Systems: Windows 98/ME/2000 SP3/XP SP2/Server 2003;
IE 6.0:version 6.0.2800.1106
updated versions: SP1;Q823353;Q903235
1.2Software Requirements
1.2.1Ruby
WET scripts are written using Ruby. Therefore, you need to install Ruby on your computer to use WET. Download Ruby from: http://rubyforge.org/frs/?group_id=167
1.2.2Microsoft .Net 2.0 Framework
WET User Interface has been written using Visual C# and it needs .Net 2.0 Framework to work. Download the Microsoft .Net 2.0 Framework from: http://msdn.microsoft.com/netframework/downloads/updates/default.aspx
1.2.3Watir
WET is an extension of Watir and works in association with it. Watir is available as a part of the WET installer (you don't have to download and install it separately). Download WET 1.0 packaged windows installer from: http://prdownloads.sourceforge.net/wet/setup_beta1.exe
Note: WET is available for Watir 1.4 and has not been tested for Watir 1.5.
.
2.Installation Procedure:
Note :
If WET 1.0 version is already installed then directly go to section 2.4 to see the steps for updating the WET.
If WET is not installed then follow all the steps.
If WET version less than 1.0 version is installed then uninstall the WET and follow the steps to install WET 1.0
2.1Installing Ruby
You
need to install Ruby version 1.8.2 and above on your computer.
Extensive knowledge of Ruby is not required to get started with WET.
However, the tester must know Ruby before developing the WET scripts.
To install Ruby, perform the following steps:
1.Download
Ruby from:
http://rubyforge.org/frs/?group_id=167
2.Run
the Ruby installer and follow the on-screen instructions.
If you have already installed Ruby, then proceed to 2.2
Ruby comes with an integrated editor called ScITE. It is used to write and edit ruby scripts. To start using this editor, perform the following steps:
1.Click Start -->Programs-->Ruby-->Ruby<version>-->SciTE Editor
2.In
the editor that opens type the
following:
##############################################
#My
First Ruby
Program
##############################################
puts
"Hello world"
puts
"Ruby is a good scripting language"
puts
"WET is amazing"
3.Save this file on to the hard disk.
4.In the tools menu of the editor, click Go (or use the shortcut key F5)
5.The
script runs and prints out the following output:
>ruby
temp.rb
Hello world
Ruby
is a good scripting language
WET is amazing
>Exit
code: 0
The above steps ensure that the Ruby is setup and is ready to run the scripts.
2.2Installing Microsoft .Net 2.0 Framework
To install Microsoft .Net 2.0 Framework, perform the following steps:
1. Download the Microsoft .Net 2.0 Framework from:
http://msdn.microsoft.com/netframework/downloads/updates/default.aspx
2. Perform one of the following steps:
a. To start the installation immediately, click Run.
b. To save the download to your computer for installation at a later time, click Save.
c. To cancel the installation, click Cancel.
Note: Make sure you have the latest service pack and critical updates for the version of Windows that you are running. To find recent security updates, visit Windows Update.
2.3Installing WET
NOTE: Ruby should be installed or else wet will not work as expected.
To install WET, perform the following steps:
1. If previous version of wet with version less than 1.0 is already installed then uninstall it as follows or else continue form forth step of installation.
Uninstall the existing version of WET manually as shown below:
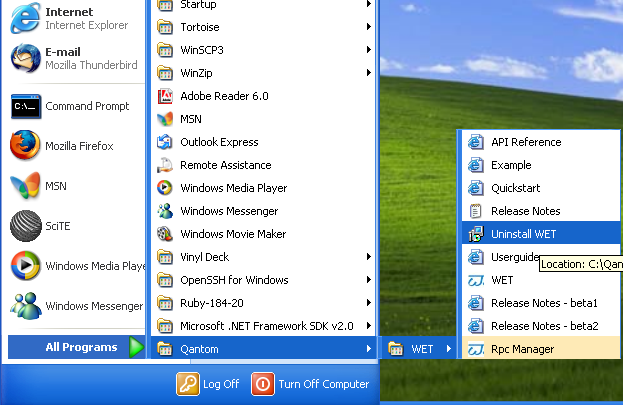
Click Start-->All Programs-->Qantom-->WET-->Uninstall WET
Then, perform the steps 2 and 3.
If you are a new user, directly perform step 3.
2. Delete Qantom folder from the install directorie.
3. Download the latest setup file for WET:
Download the latest setup file from: http://wet.qantom.org/downloads/Wet_1.0.0.final.exe
Run the setup file by following the on-screen instructions as shown below:
Accept the License Agreement by Clicking on IAgree
if u want to install wet for all the users in the system select all users or else select only for me and then click on next.
Select the path for installing wet and click on install.

NOTE : The default folder for installation is c:qantomwet. We recommend that you use this as the default path. Do not use “c:program files” as the installation directory. Thanks to the space in it, you may run into various issues!!!
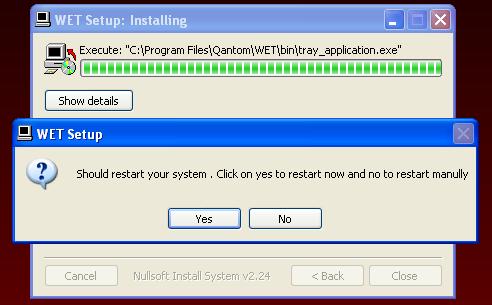
In the next screen, select “Yes, I want to restart the computer now” and click close.
After completing the installation, it's time to check if WET has been installed correctly. To do so,
follow the steps in section 2.5.
2.4Updating WET1.0
To Update WET, perform the following steps:
1. Update is valid only for WET1.0 version, to update WET1.0 follow the follow the below steps :
2. Download the latest setup file for WET:
Download the latest setup file from: http://wet.qantom.org/downloads/Wet_1.0.0.final.exe
Run the setup file by following the on-screen instructions as shown below:
click on next to continue with the setup.
Accept the License Agreement by Clicking on IAgree
if u want to install wet for all the users in the system select all users or else select only for me and then click on next.
In the early stage of installation a command prompt will be opened to update the gem files, if more than one version of gem files is installed select all option to un install the gem files.
NOTE : if more than one version of gem files are installed in the system the gem files gets corrupted so its recommended to install only set of WET get files i.e, wet, watir and wet-winobj gem files.
Location of installation will the path of previous installation, now click on install.
In the next screen, select “Yes, I want to restart the computer now” and click close.
2.5 Test installation
After completing the installation, it's time to check if WET has been installed correctly. To do so, create a new ruby file in one of your directories in you local harddrive and call it as firstwet.rb. Type the following lines in that file:
#########################
require 'WET'
include WET
ie = Browser.new()
ie.goto("http://wet.qantom.org/examples/hello.html")
ie.TextField( 'label:=Please type here').set("Hello there!")
sleep 5
ie.Button('value:= OK ').click
#########################
open a console window and change to the above directory. From this directory run the newly created ruby script by typing the following command:
ruby firstwet.rb
The result of running this script is:
a. A new IE window is opened.
b. This IE window navigates to the page http://wet.qantom.org/examples/hello.html
c. In this page, the text "Hello there!" is typed
d. After this, the OK button is clicked
e. A new page is opened which confirms the text typed.
That's it. It simply means that WET has been installed correctly.
3.Verifying User Interface:
a. After restarting the computer, you should find the WET RPC Manager on the system tray as shown below:
![]()
b. RPC Server should be running:
Right-Click the WET Rpc Manager icon on the system tray and select Check Rpc Server.
You should get the Success screen as shown below:

b. To start the UI,
Click Start-->All Programs-->Qantom-->WET-->WET Manager.
You should get the screens shown below:

After
the logo wet manager screen is displayed as below :
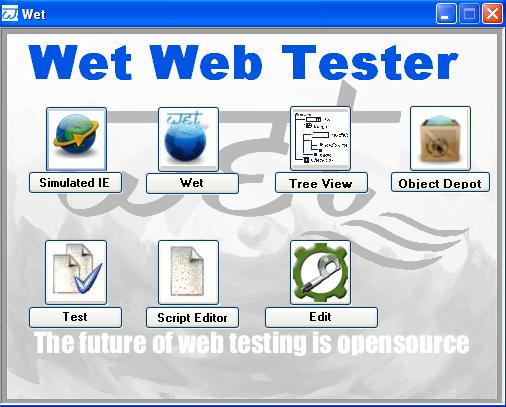
Clicking on any of the icon the corresponding window will get opened.
For more information on automating using WET, refer the tutorials and the docs in the WET web site.
|
WET is a opensource automated web testing tool which uses Watir as the library to drive web pages. WET drives an IE Browser
directly and so the automated testing done using WET is equivalent to how a user would drive the web pages. WET extends the
scripting abilities of Watir and also offers the convenience of recorders. It is licensed under LGPL and BSD style open source licenses.
|